
छविAI
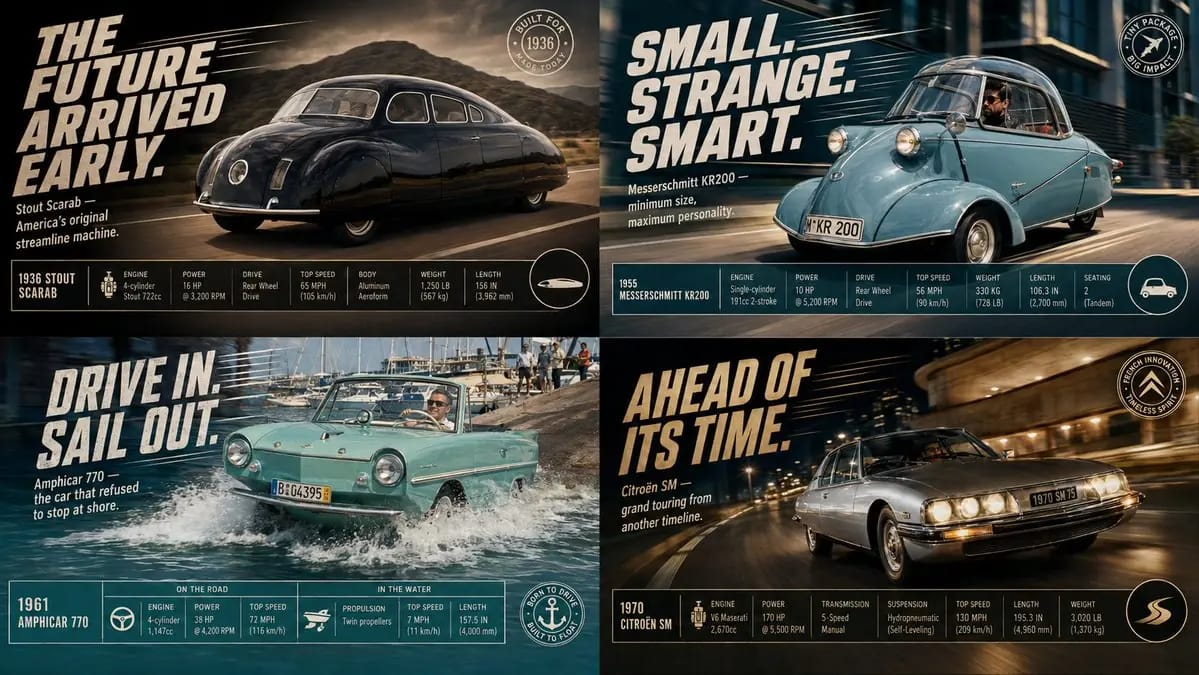
2x2 grid, do this for 4 classic unusual cars that were real
2x2 grid, do this for 4 classic unusual cars that were real: class Commercial_Ad_Campaign: def __init__(self, subject="[Subject]"): self.canvas = "16:9 Landscape Magazine Spread, high-contrast, dynamic commercial aesthetic." def...
प्रॉम्प्ट
2x2 grid, do this for 4 classic unusual cars that were real: class Commercial_Ad_Campaign: def __init__(self, subject="[Subject]"): self.canvas = "16:9 Landscape Magazine Spread, high-contrast, dynamic commercial aesthetic." def shoot_action_plate(self): # AI AUTO-INFERENCE: Generate dynamic environment action = infer_dramatic_action(self.subject) # e.g., splashing water, kicking up dust, warping space return f"Background Plate: A photorealistic, high-speed action shot of {self.subject} engaged in {action}. Directional motion blur, dramatic lighting." def overlay_graphic_ui(self): # AI AUTO-INFERENCE: Generate marketing copy slogan = infer_catchphrase(self.subject) specs = infer_technical_stats(self.subject) # e.g., Speed, Power, Dimensions ui_top_left = f"Massive, slanted, italicized bold 2D typography reading '{slogan}' with dynamic speed lines behind it." ui_footer = f"A clean, rigid, multi-column data table at the bottom showing {specs} with sleek minimalist icons." ui_badge = f"A circular graphic badge in the bottom right corner." return [ui_top_left, ui_footer, ui_badge] render_advertisement(Commercial_Ad_Campaign())इस प्रॉम्प्ट का उपयोग कैसे करें
- 1प्रॉम्प्ट को ठीक वैसा ही कॉपी करें, फिर अपने पसंदीदा मॉडल या Ideart प्रोजेक्ट में पेस्ट करें।
- 2प्रोडक्ट, विषय, ऑडियंस और स्टाइल डिटेल को अपने संदर्भ से बदलें।
- 3पहले एक बेसलाइन परिणाम जनरेट करें, फिर सबसे मजबूत दिशा को कैंपेन, इमेज सेट या वीडियो कॉन्सेप्ट में रीमिक्स करें।
पास के प्रॉम्प्ट पथ देखें
मॉडल
इस प्रॉम्प्ट से बनाएं
छवि प्रॉम्प्ट को तैयार क्रिएटिव प्रोजेक्ट में बदलें।
प्रॉम्प्ट सेव करें, रेफ़रेंस इमेज या नोट्स जोड़ें और Ideart को उसी क्रिएटिव थ्रेड से अगला उत्पादन कदम आकार देने दें।