
ImageAI
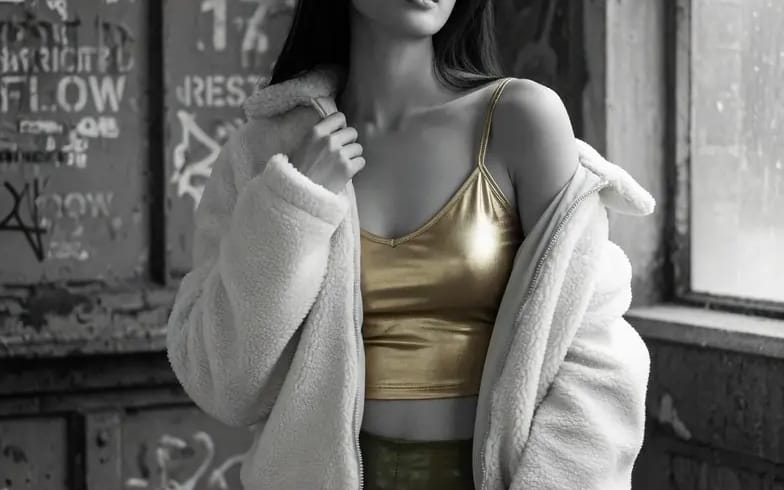
Using Reference Image 1 as the sole visual basis
把【图1参考图】作为唯一视觉依据,生成一张竖版 3:4 的街拍摄影知识分析图(教学信息图海报)。目标:用清晰有趣的图示把“人物位置、相机位置、镜头/距离、机位高度、拍摄角度、构图要点”讲明白,达到教别人复拍的目的。整体风格:干净高级的摄影教程信息图 + 轻手账式标注;浅米白纸感底或浅灰底;黑白灰为主;从图1自动提取1–2个颜色作为点缀;线条清晰、信息密度高但不杂乱、排版对齐统一、可读性强。 强制规则: -...
Prompt
Using [Reference Image 1] as the sole visual basis, generate a vertical 3:4 street photography knowledge analysis diagram (instructional infographic poster). Goal: Use clear and engaging diagrams to explain "character position, camera position, lens/distance, camera height, shooting angle, and composition key points" in a way that teaches others how to replicate the shot. Overall style: Clean, high-end photography tutorial infographic + light journal-style annotations; light beige paper texture background or light gray background; primarily black, white, and gray; automatically extract 1–2 colors from Image 1 as accents; clear lines, high information density but not cluttered, aligned and unified layout, strong readability.

Mandatory rules:
- Must retain from Image 1: character pose, relative position between character and environment, main background structural lines, light direction and spatial logic
- Do not change the pose or scene, only present it as an "analytical diagram"
- Faces are not the focus: can be lightly blurred/simplified, no realistic beautification, do not enhance facial features
- All in Chinese; no English, no brand names, no watermarks, no UI interface elements

Fixed layout (same every time, does not change with Image 1):
1) Main visual area (upper half or left large image): Place a "reference image display" (lightly stylized/illustrated based on Image 1, but scene and pose must be recognizable), overlaid with: rule of thirds grid, subject outline box, leading line hints, vertical/horizontal line correction hints; use numbered dots + hand-drawn arrows to mark key points (subject placement, breathing room direction, leg extension direction, background leading line source).
2) Diagram area (right side or lower half, two side-by-side):
- Top View: Use minimalist icons to draw walls/streets/building edges (abstracted from Image 1), character position (small person icon), camera position (camera icon); must show shooting direction arrow, character-to-camera distance (dashed line + value range), recommended standing positions A/B (two alternative spots); camera orientation must match Image 1 (direct front/side front/oblique front, etc.).
- Side View: Draw ground line, character height indication, camera height indication, elevation/depression angle sector; must show camera height range (reasonable range inferred from Image 1), lens elevation/depression angle range (reasonable range inferred from Image 1); low angle/eye level/high angle must be correct.
3) Parameter card area (three fixed rounded cards at the bottom):
- Card 1: Lens and Distance (provide recommended equivalent focal length range + recommended shooting distance range)
- Card 2: Camera Height and Angle (provide camera height range + elevation/depression angle range)
- Card 3: Pose and Body Key Points (summarize replicable key points of the pose from Image 1 in short phrases)
4) Error demonstration area (fixed at bottom right): 3 red cross error tips (automatically generate the 3 most relevant ones based on Image 1, in short phrases), for example: do not use ultra-wide angle close-up, do not crop toes/fingers, do not have camera too high causing proportion distortion (automatically adjust based on the actual situation of Image 1).

Automatic inference requirements (so it works every time Image 1 is replaced):
- Automatically infer and write into the diagram from Image 1: camera orientation, camera height, shooting distance range, equivalent focal length range, subject placement and cropping strategy, background leading line source
- All values expressed as "ranges" (credible and replicable), do not give a single fixed number

Output requirements:
High definition, sharp lines, natural shadows, unified icons, tidy layout, readable information; no garbled text, no Logo, no watermark, no unnecessary decorations.

Negative constraints:
No watermarks, no Logos, no English, no garbled text, no overly realistic faces, no exaggerated cartoon proportions, no limb distortion/extra fingers, no cluttered layout, no low definition, no heavy filters, do not change the character pose and scene relationship from Image 1.
How to use this prompt
- 1Copy the prompt exactly, then paste it into your preferred model or Ideart project.
- 2Replace product, subject, audience, and style details with your own context.
- 3Generate one baseline result first, then remix the strongest direction into a campaign, image set, or video concept.
Explore nearby prompt paths
Model
Categories
Build from this prompt
Turn a image prompt into a finished creative project.
Save the prompt, add reference images or notes, and let Ideart shape the next production step from the same creative thread.